I found some shimmery blue tile at Lowe’s and thought it would be perfect to make a mermaid on the wall. This started off great. I also had some metallic bars, that to me looked like gold bars, and some penny tiles that looked like doubloons. Here was the original concept.
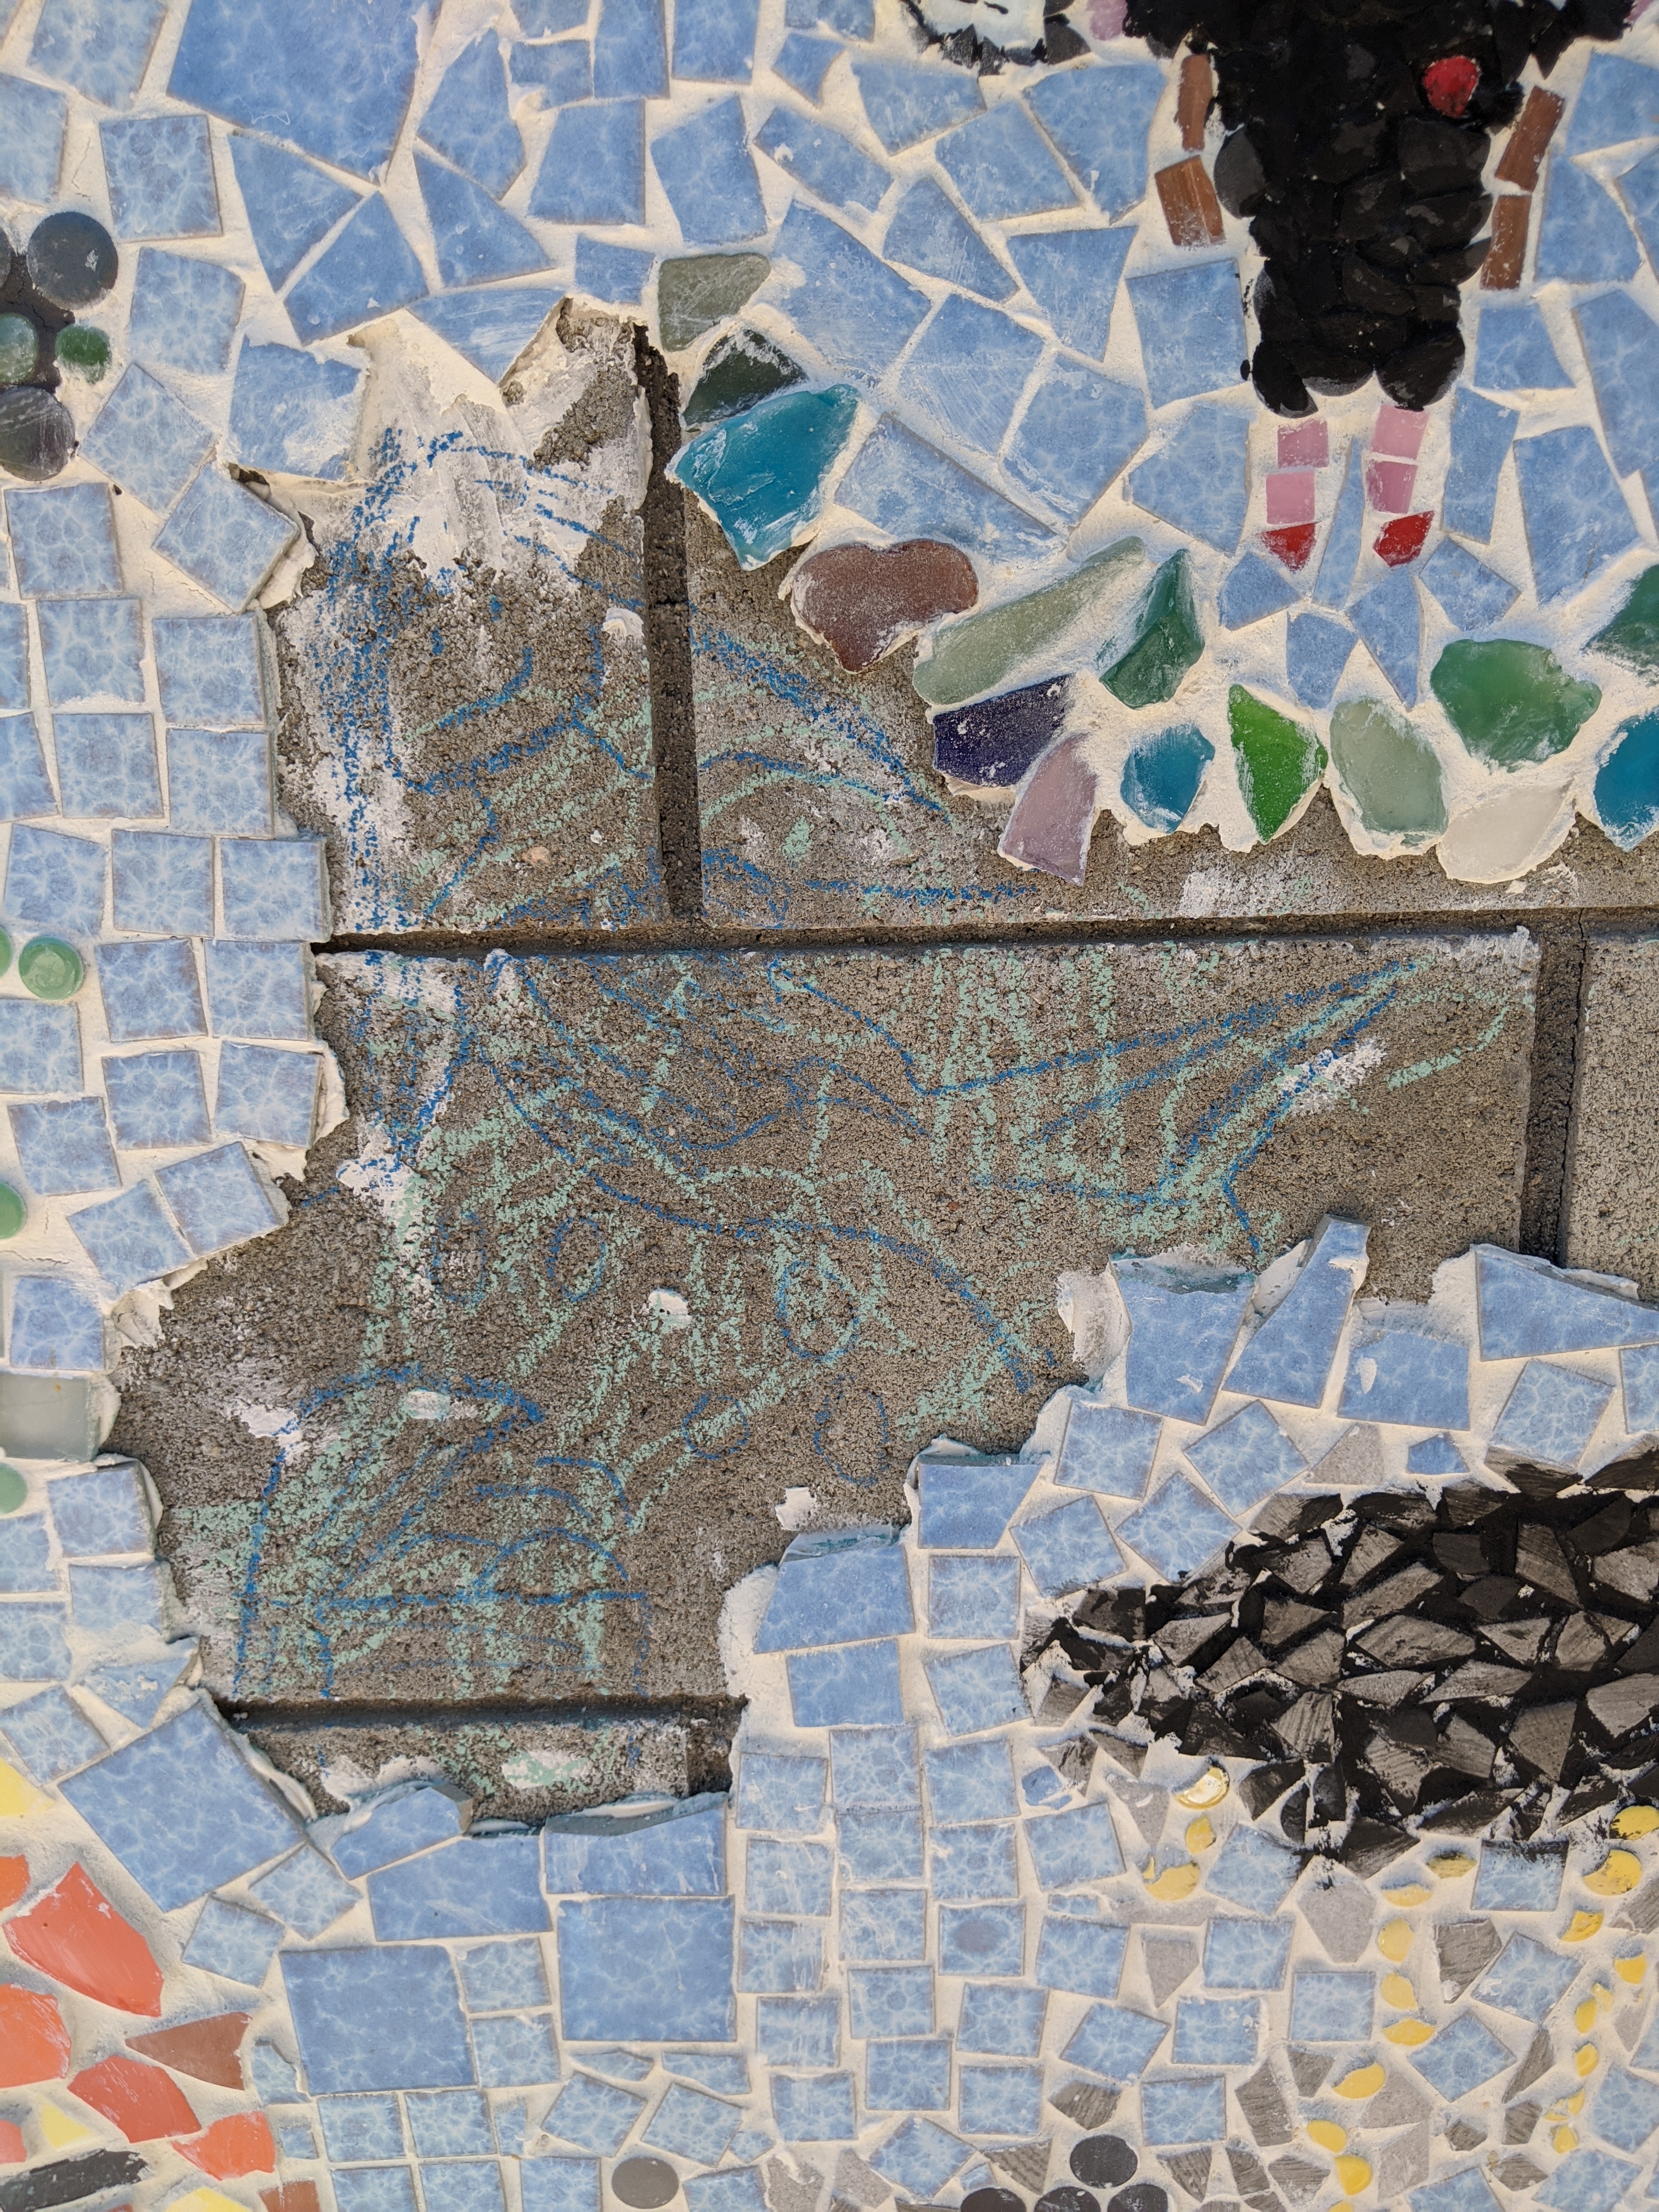
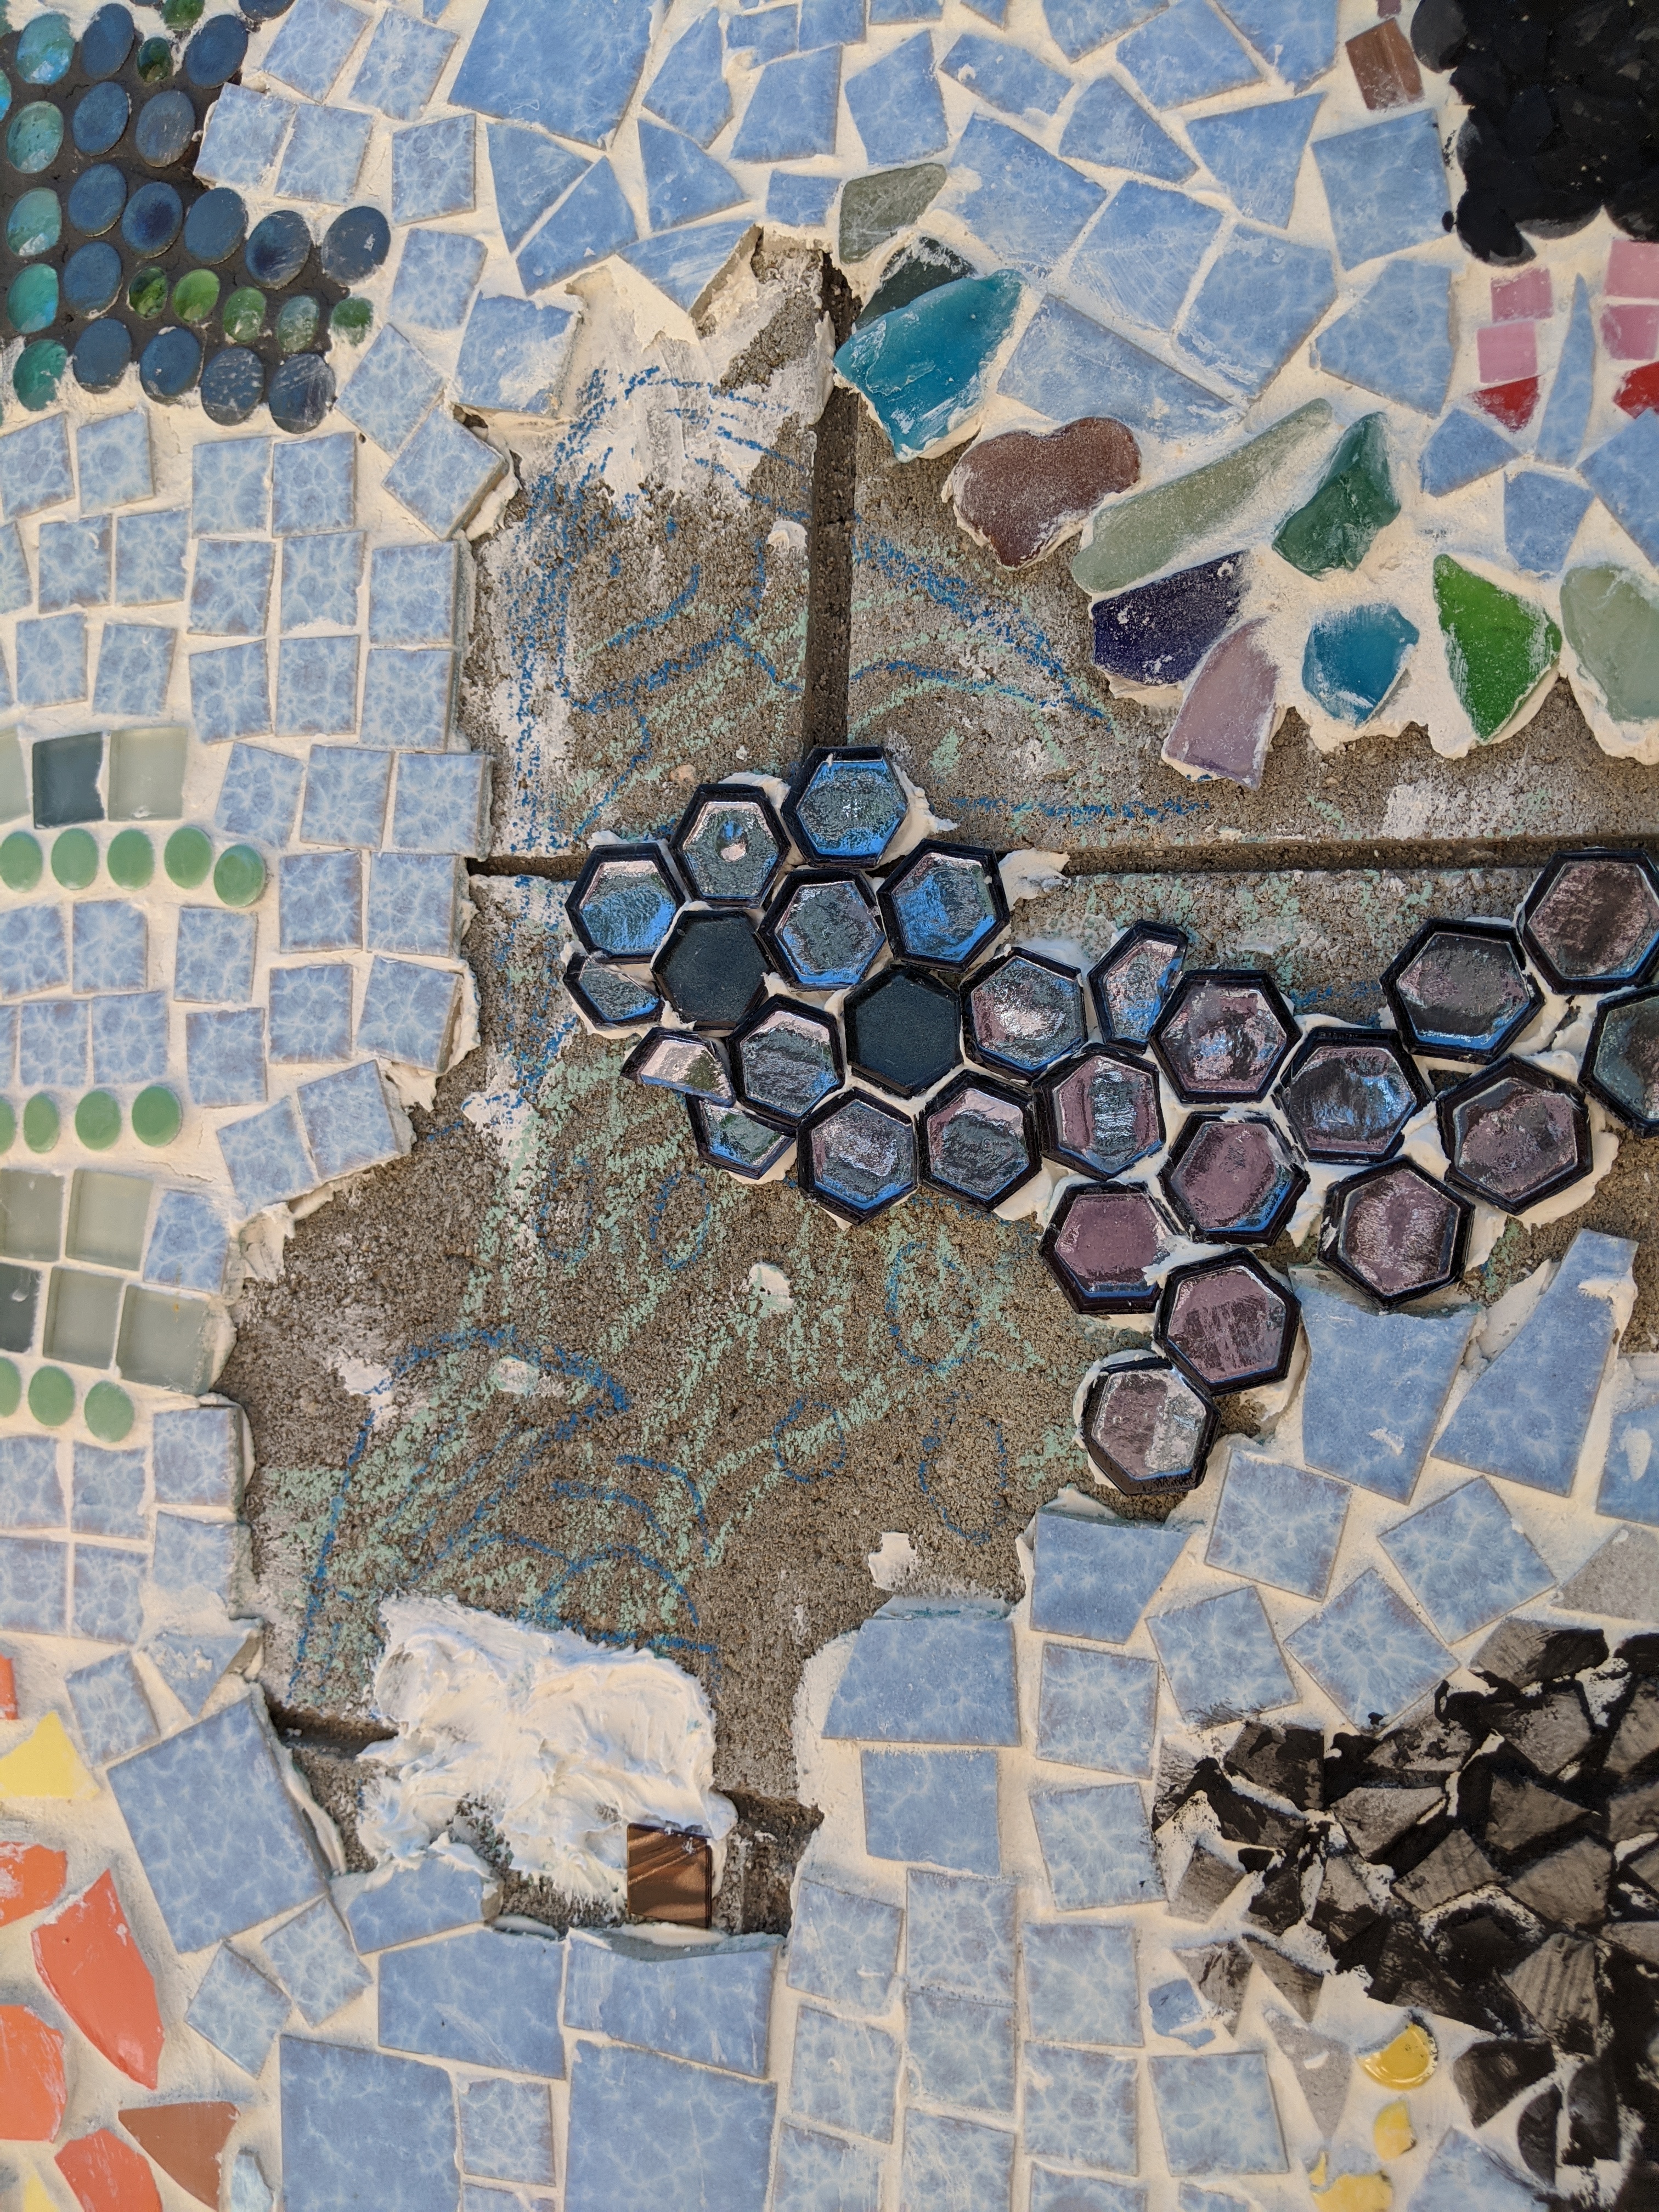
Because it was complex, I did a chalk outline on the wall first first.
Then I added in the tail. So far so good.
Even the ungrouted mermaid looked pretty good, I thought.
But thenI had a problem. The lavender tile was really hard to see in the surrounding blue sea. I made the unfortunate decision to paint the grout black. Lol, obviously this was a mistake. It looked like a black walrus with red hair.
So I had to go back and grout over it, with white grout. Eventually I repainted the joints in the arms so they were visible. I changed the eye color to blue and in retrospect I should have left them black. I noticed too that the treasure chest looked like a cardboard box.
The final result is below. I rounded the treasure chest, added more to the bottom, and did the best I could with the little mermaid.
I think it’s important to show how much you can mess things up in a project like this. When everything is seen together, you can get away with the small stuff.
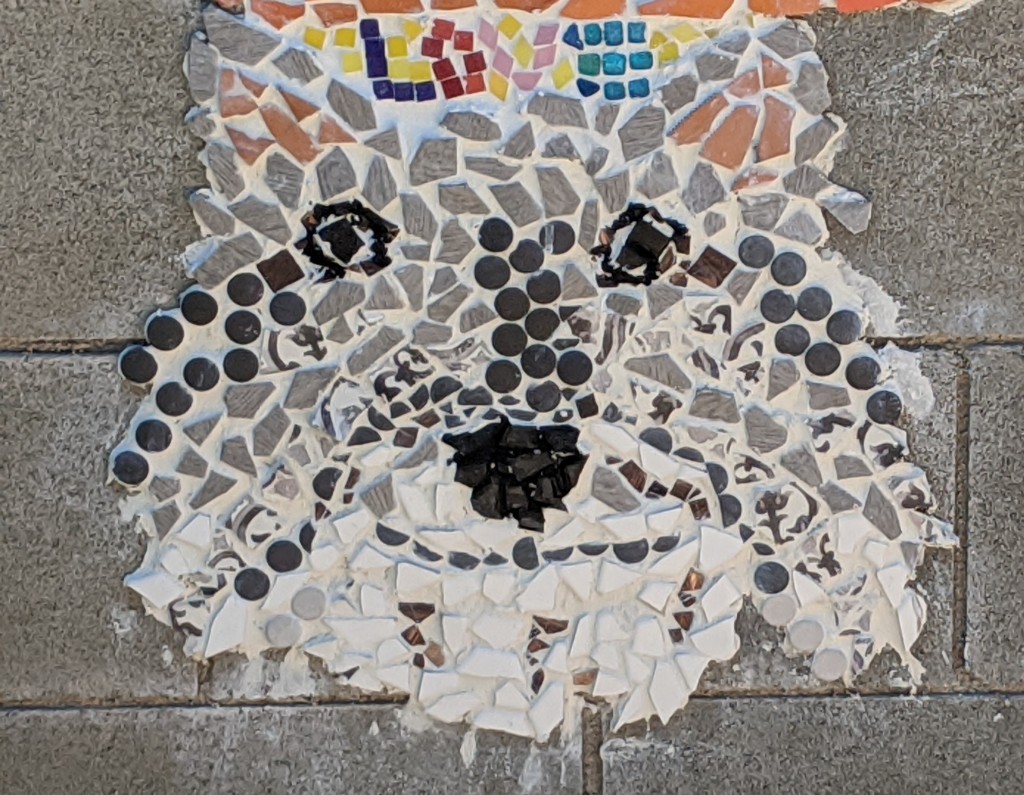
Though I didn’t add the pets to the wall all at once, eventually they all made their way. The first one I attempted was my Mini Schnauzer, Anna. I was excited because as I made her likeness on the wall, I was looking at an old picture of her on my phone. When I finished though, she looked more like a raccoon than a Schnauzer. As I’ve filled in the areas around her, she’s starting to look more like a dog. As of today, she’s 15 1/2 years old and still just as wonderful as when I got her at 4 months old.
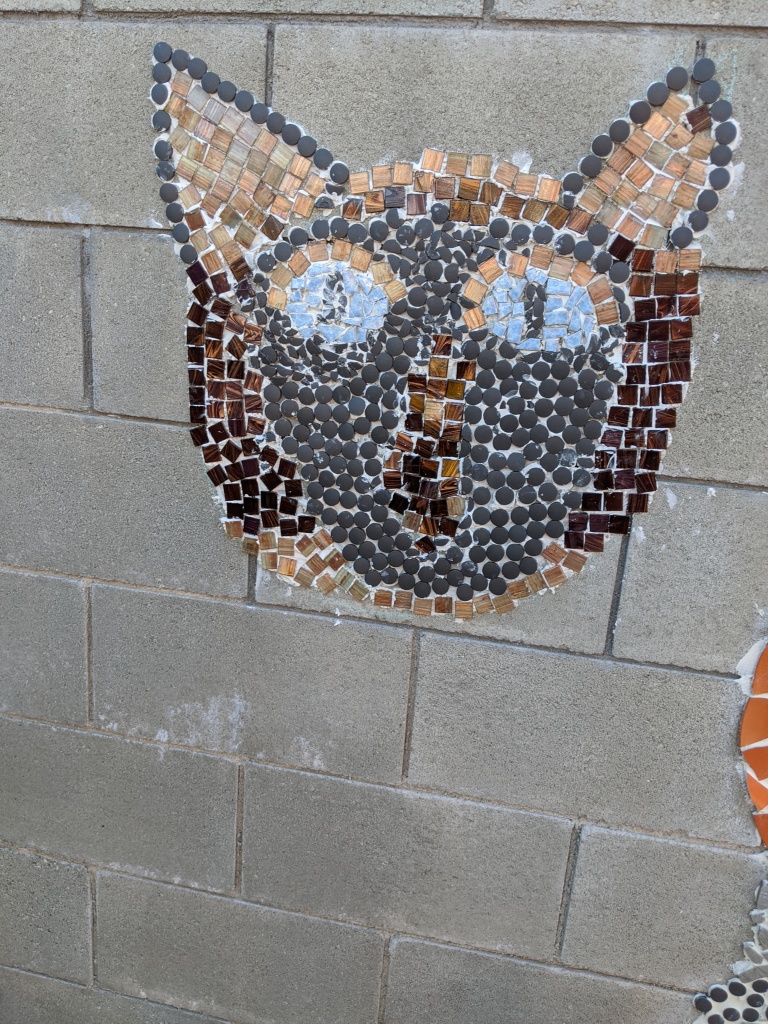
The next pet attempt was Sasha, my 21 1/2 year old Siamese cat. This was shortly after I discovered grout paint, so I colored her face in. Somehow the mosaic ended up huge, compared to everything else. Since this is a creative endeavor, merely to keep my brain busy and cover the gray concrete, I decided to enjoy the giant Sasha mosaic.
Next came Mabel, who came out just about how she looked in real life. We only had Mabel for a short time. Two years ago I went outside for a walk and saw a woman with her on a leash. The woman said she’d found her running in the street and thought someone may have dumped her. I estimated her to be about ten years old, which a chip later confirmed. She was a pretty dog, well behaved, and very itchy. I said I’d take her in until we could find her owners, since the woman was going to have to bring her to a shelter. The owners never appeared. Mabel loved the other pets and instantly took charge as the pack leader, guiding them along the way as herding dogs do. She had a big personality and we loved her very much for the time we had her. About a year in, she developed heart disease. Despite lots of vet visits and, by the end, twelve pills a day, plus allergy shots, eventually her heart gave out. I’m happy that I see her image every day on the wall.
Next came Lily, our Yorkie. Like Anna, Lily came with me from Massachusetts. She passed away about a month before Mabel, also from heart failure. Lily had health issues for many years but she was so sweet. Losing two dogs so quickly was heartbreaking and I’m glad I added them to the wall when they were still with us. She was about 8 1/2 when she passed away.
Scruffy was the last mammal entry. We got Scruffy about five years ago when we innocently went to PetSmart to get cat food. It was Pet Adoption Day and Scruffy was with her foster sisters, in a small area in the center of the store. She was ten months old when we got her and had been rescued from a kill shelter. She’s a great dog but has really been affected by the loss of Mabel and Lily.
Tortuga was my boyfriend’s turtle long before I was in the picture. I know the mosaic looks nothing like him but turtles are hard to make. Tortuga came from a street fair when he was about the size of a silver dollar. He’s about twenty-five years old and the oldest pet.
I hope you enjoy a glimpse into my life, and seeing my pets.
One thing I really miss about living in Massachusetts is the Grape-nut Pudding. For anyone who doesn’t live there, it’s a thick custard with soft Grape-nuts on the top, and pieces mixed in throughout. It has a special taste, like Grape-nuts so a little hard to describe. When I was growing up, we’d buy it at the deli. I tried to make it at home once, many years ago, but it wasn’t the same.
About six months ago I discovered agar agar. It’s a thickening agent like gelatin but made from seaweed, and not horses. Being a vegetarian, gelatin isn’t something I eat anymore. Even when I did, it was always Jell-O brand, and fruit flavored. The recipes for agar agar range from sweet to savory and I’ve used it dozens of times since I discovered it. I made a lot of mistakes with it during this time and learned what not to do, how much to use, and some tips along the way that avoids getting a mouthful of what feels like plastic. I know, I’m making it sound unappealing. Seaweed? Plastic? Forgot all that and instead think of how nice it would be to have a large portion of Grape-nut pudding that’s only 100 calories, 6.5 carbs (5 net carbs if you subtract the fiber) and 15 grams of protein.
Ingredients:
1/4 cup Grape-nuts. I used a generic called Nutty Nuggets
Use half of the Grape-nuts, and spread them into the bottom of 4 small ramekins.
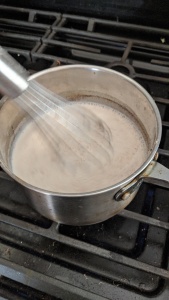
Add all ingredients except the Grape-nuts and agar agar to a medium saucepan and turn the heat to medium. Whisk (you need a whisk or the agar agar will clump) as you sift in the agar agar. You don’t need to use a formal sifter, just add it in gradually as you whisk.
Whisk quickly. For five minutes it will seem fruitless but then it thickens all of a sudden. Keep whisking for another 2 minutes or so until it just starts to come to a boil. Pull off the heat and add the rest of the Grape-nuts and whisk those through. Pour into the ramekins carefully, so as not to upset the Grape-nut layer. Leave them to cool for about a half hour and then refrigerate.
If you eat it warm there’s a weird gluey texture. Wait until they’re completely chilled, a couple of hours or the next day, even better. Use a knife to loosen the edges and pop them out. Top with whipped cream or whatever you like.
There are endless possibilities you can make with protein shakes and this thickener so use your imagination.
I’ll start by saying that I recently read it’s only in English that we feel the need to differentiate the words cocoa (the stuff we put in everything, the luxurious ingredient that I’ve used for comfort and congratulations throughout my life), and cacao which is the bean where it comes from. Cocoa is the English adaptation of cacao. The main difference in the meaning though is that cacao means the raw beans, unroasted, and cocoa is after roasting.
A couple of months ago I saw an ad on Instagram for Crio Bru. The ad, and then the website, explained that it is not coffee, but roasted cacao beans. I drink a lot of coffee, and if I wasn’t trying to lose weight (perpetually) I would drink hot chocolate all the time. I’ve tried sugar free packets of cocoa and don’t like it. I’ve tried, more times than I can count, heating almond, cashew, you-name-it dairy and non-dairy milk, and adding unsweetened cocoa and Splenda or other sweeteners. It’s never very good. This concept was something different though, something I hadn’t thought of. They roast the cacao beans, grind them, and boom, something like coffee but actually chocolate. I’m a sucker for online ads, and for TV ads back when I had cable and commercials. I bought a 10oz bag for $14.99, though I bought it from Amazon. It still came from the same company it’s just easier that way, no shipping, and I’d get it more quickly.
I received it a few days later. The site says to use a French Press for optimal results but I didn’t have one so I used it in my percolator. Wow, it was really, really good. But I felt like it would be better with a more intense brewing process.
This led me to buy a Turkish coffee pot. When I lived in Massachusetts and was tutoring a priest from Jordan to help with his English, he would make me Turkish coffee each week. It was thick and rich and wonderful. So I ground the grounds more finely and made Turkish cocoa. It was wonderful except I’d end up drinking sediment. It was chocolate sediment but still not ideal. So I bought a tiny strainer. Better but still a hassle. The other problem was that it made tiny cups.
One day, while shopping in Grocery Outlet, I saw a French Press for $9.99. And that was when the fun began. I went through the first bag so quickly, and knew this was going to be my new favorite drink so I had to find a cheaper way to get the product. A year or so before I’d bought raw cacao nibs from Amazon to add to smoothies. I found this 2 lb bag for $14.99. Since then I’ve bought a second bag. Anthony’s makes a great product.
After some experimenting, here’s how to make this at home, inexpensively and deliciously.
Spread a thin layer on a cookie sheet. Bake for 10 minutes at 375 degrees or until it looks like picture 2, dark and roasted. The house will smell so good. Note the color of the nibs in my hand. They will be nutty and crunchy. The raw ones have a vinegar under-taste.
From there I put them in a spice grinder. If you have a coffee grinder, even better, but I just have a spice grinder and it works fine. Just a few quick pulses. If you grind too finely it won’t work well.
For each 8 oz of water I use two tablespoons grounds. Add ground nibs to the bottom of the French Press, add almost boiling water, insert the plunger part way down, not all the way, just enough until it’s a little submerged in water. Make sure the grate part of the plunger is turned so there’s a tight seal. Wait 5 minutes (longer if you want it richer) then push the plunger down all the way. Turn the top to expose the grate, and pour it out. You’ll lose some water in the grounds. I generally use 2 cups of water and 4 tbl of ground nib and it fills the mug below about 3/4 of the way. If you’re making smoothies, you can use the grounds for that later. They taste good as is and I hate throwing away perfectly good chocolate. They have calories though so use them sparingly. I can’t say for sure how many calories or carbs my creation has but Crio Bru (per myfitnesspal) says it’s 10 calories per 8 oz and 1 carb and I can’t see how it would be much different since I’m just using raw nibs, roasting, grinding, and drinking.
Despite being a sugar fiend, I mostly drink this with nothing in it at all. It’s really dark and rich as is. But I’ve experimented a little and found that pouring a little Torani Salted Caramel sugar free syrup onto the beans before adding water, adds even more flavor. I’ve also tried a Truvia or Spelnda packet. It’s all good, it’s just dependent on what you like.
Inspired by the autumn tree, I decided to create a haunted house all around it, replete with a spooky cemetery, ghosts, a black cat, and some bats. A storm cloud with lightning completed the scene.
I used penny tiles (small round mosaic tiles sold by the sheet) for the black cat, ghosts, gravestone, and bats. Since they are small, it was tough to use my glass cutting tool. Instead I smashed them with a small hammer and they mostly broke in half on their own. These are my favorite type of tiles to work with because they break easily and don’t cut my fingers. The blue was leftover flat tile I bought online. The orange leaves and green grass below are broken 99 Cent Only Store broken dishes.
Spooky things under the tree
I used black grout paint on the gravestone. The bats were black penny tiles split in half. Tiny pieces of broken yellow penny tiles make the cat’s eyes.
I tried but failed to get the effect of shadow people in the windows. In retrospect their bodies should have started at the windowsill. You’ll have to use your imagination and pretend they’re floating ghosts. I used gray tile for the storm cloud with black grout paint, and flecks of gray with yellow for the lightning.
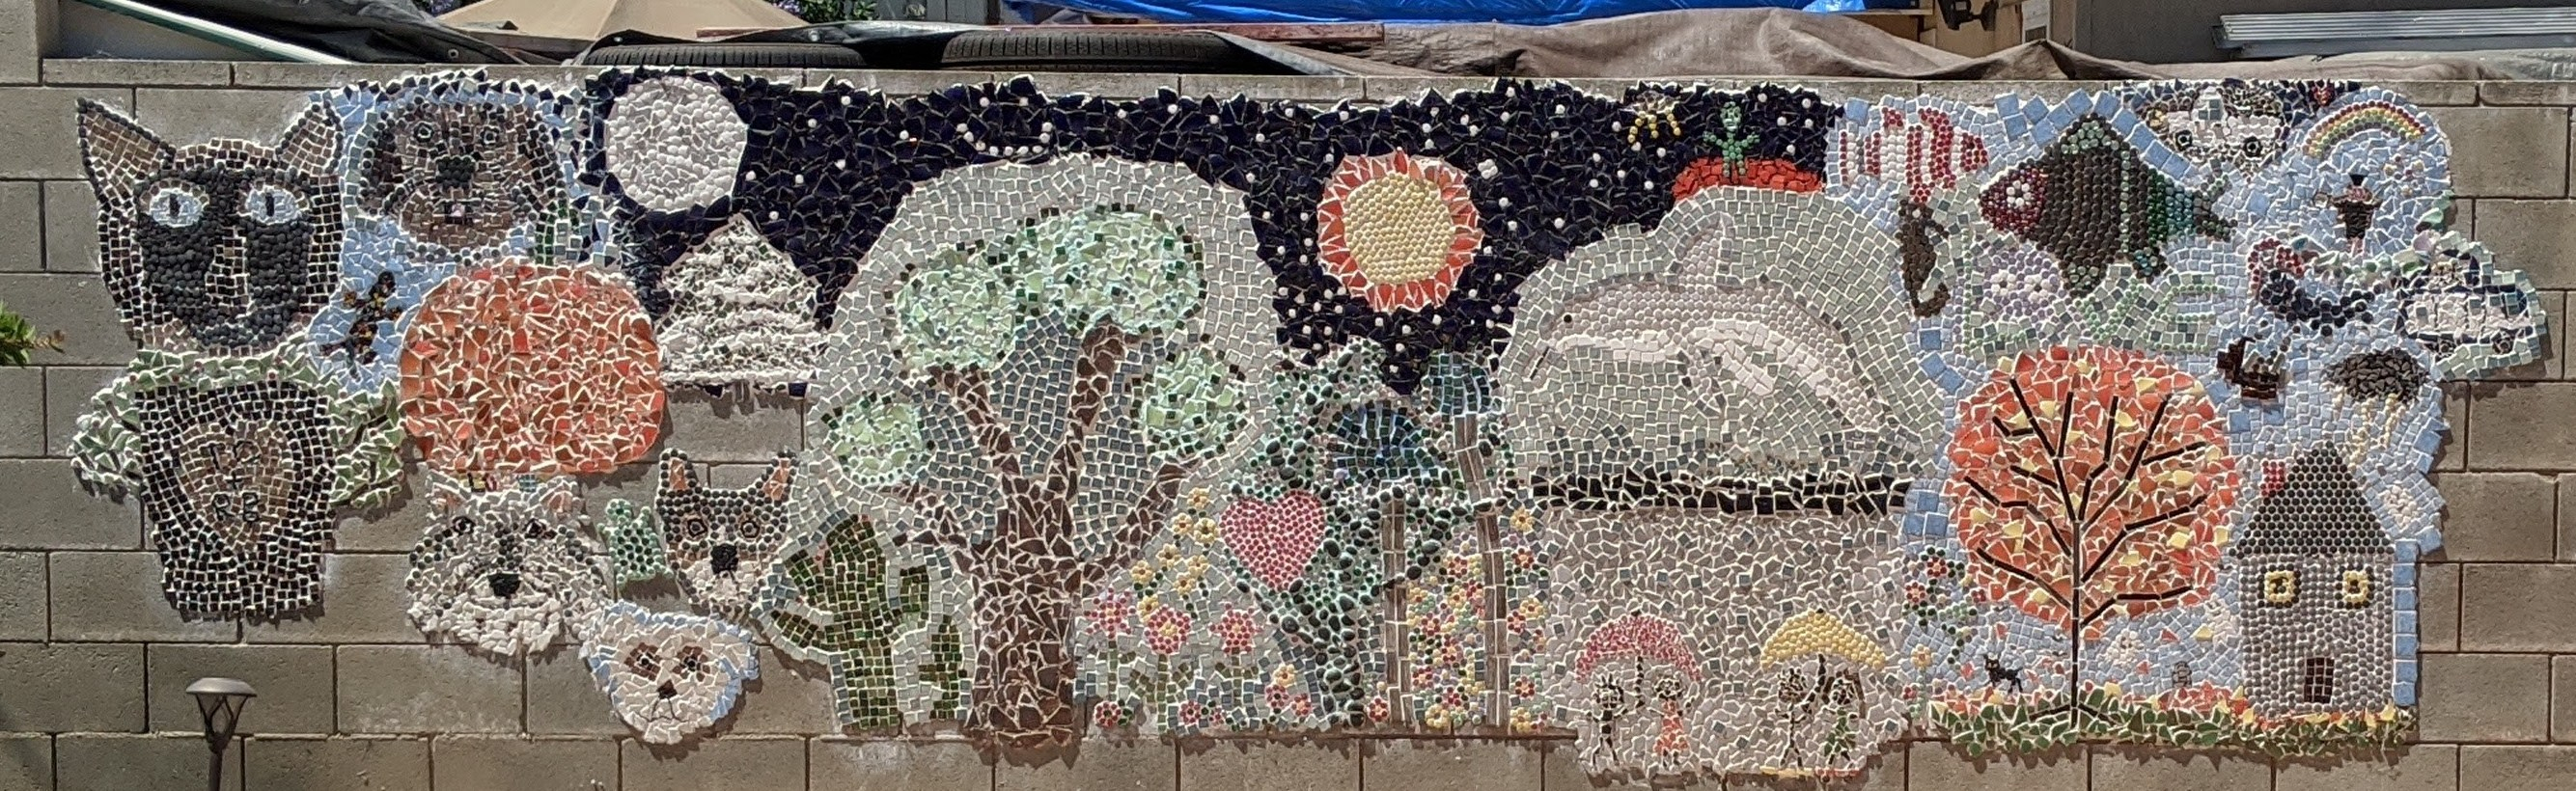
The full house is shown below, taken recently with some new items around it, others covered in previous blogs. Shown further below is the current picture of the whole wall, though I add to it all the time.
the house with the surrounding fun things
The wall as of the end of July 2020
Thanks for tagging along as I beautify the concrete wall and have fun with creativity.
Though my original tree was a bit of a mess, the next one I made is still one of my favorite pieces. For this I used a lot of broken plates from the 99 Cent Only Store. For the branches I used pieces of glass tile leftover from my kitchen renovation.
On the heels of that, I made a winter tree, which reminded me of New England winters that were such a wonderful part of my past. This was a combination of mosaic tiles from sheets (green and brown) and broken white tiles I bought in a sheet.
What I’ve noticed when creating this wall is how different items look once they’re surrounded by more tile. Later I broke dark blue dishes from the 99 Cent Only Store when I was creating a night sky and constellations, and added them around the tree. For this I painted the grout with black grout paint and wiped away the extra.
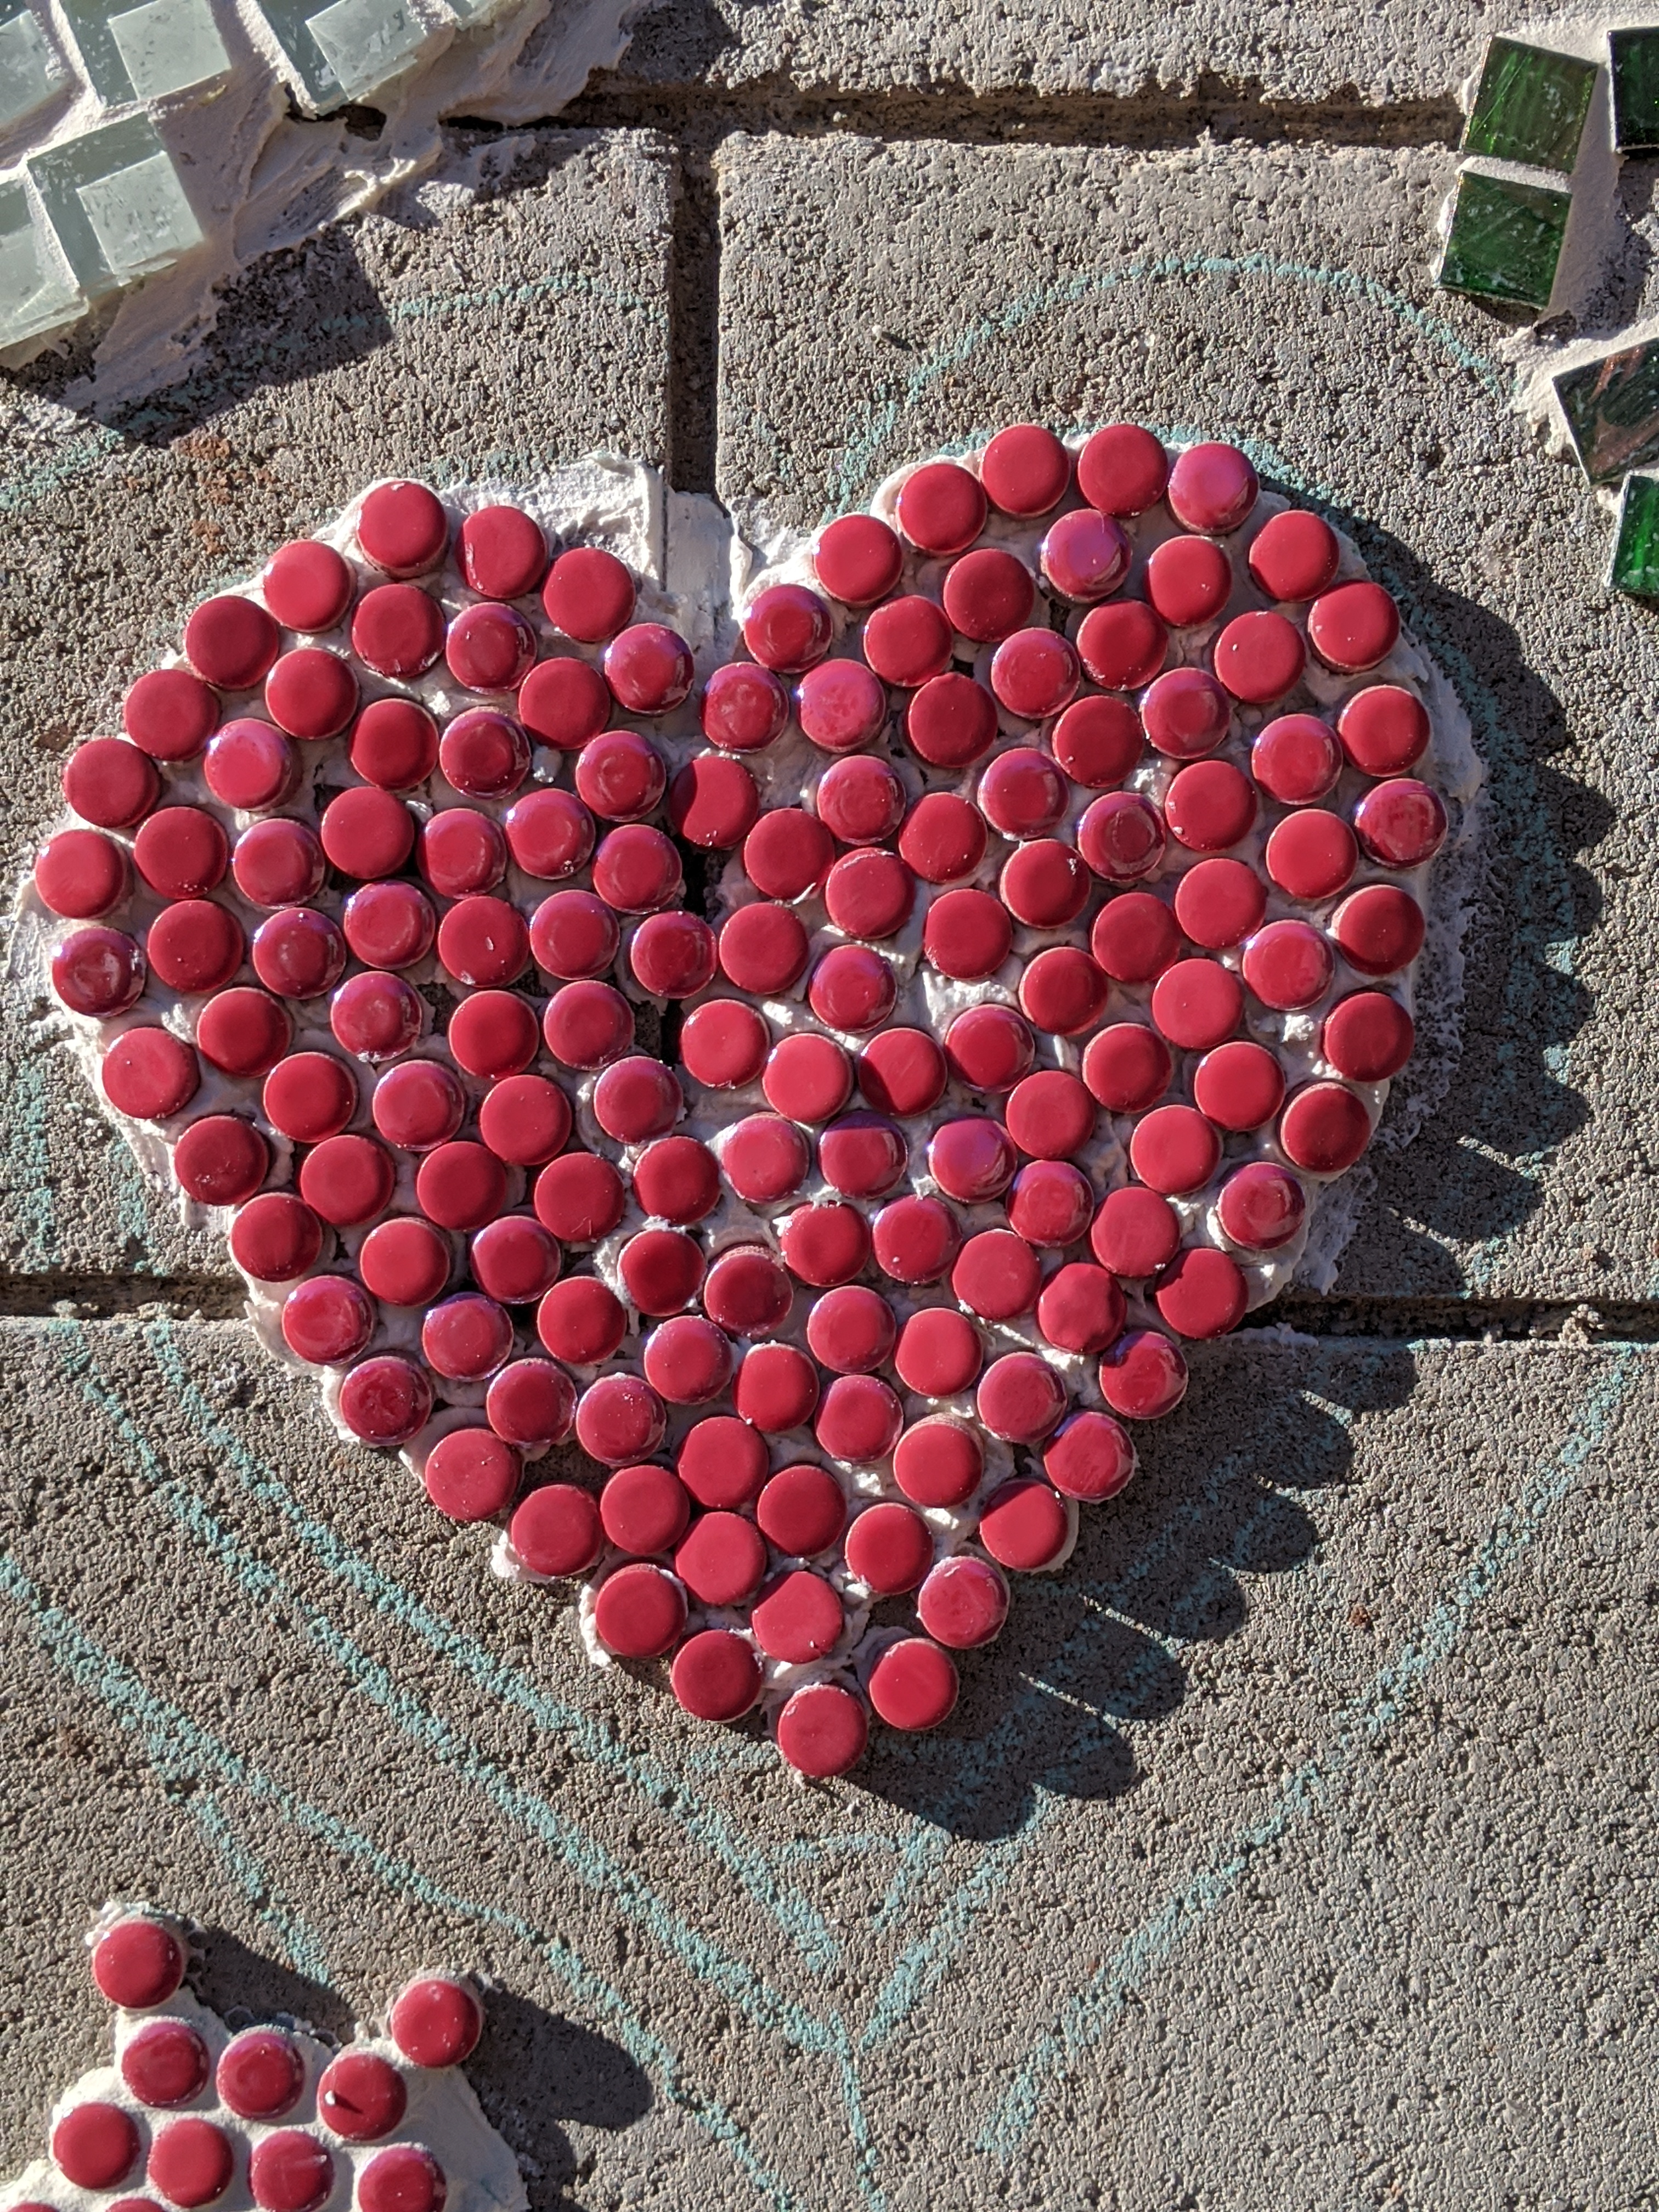
For Valentine’s Day I made a heart. Nothing very impressive but you can at least tell what it is. You can see the chalk line, where I planned the size. Once I started working on it, I realize I’d never have enough red tile to make it that big. It ended up smaller but still plenty big enough. The picture below is before it was grouted.
The wall was coming along but there was so much ugly gray concrete left to cover. I’d made some palm trees which didn’t look great so I wanted to spruce those up as well (tree pun). This was done with a combination of craft stones, and various colored penny tiles I bought from Home Depot online because stores don’t carry them.
Where I live in Southern California there are a lot of fires. Though my house has been spared, and hopefully will continue to be safe because we live toward the center of town, not by the hills, there are a lot of burned trees around. After a fire, you see a lot of black trees. Often enough though, you will also see leaves growing out of them, and eventually, a lot of regrowth. I used river rocks from the Dollar Tree to represent all the burned trees that continue to sprout life.
And because I now live in the southwest, I felt compelled to make a cactus.
As always here is a picture of the grout and adhesive I use.
Here’s a current picture of the wall from August 3.
When trying to find new ideas for the wall, I found clearance penny tiles at Home Depot. They were pearlescent and shimmery and instantly made me think of fish scales. Needing guidance, I searched Google and saw several images of fish. One would think making a fish would be pretty easy. It’s a basic shapes, limited colors right? For some reason this was harder than I thought it would be.
The layout on the white board was after several rounds of rearranging pieces until it actually looked somewhat like a fish. Unfortunately I can’t capture how sparkly it is with the camera. Especially at night, the piece is as pretty at Rainbow Fish.
Sometime later, I decided to expand upon the underwater section and made a small red and white fish, a seahorse, and LOVE spelled out with seaweed and an octopus.
It may be hard to see the letters but look closely. I made sure the octopus had eight legs. In retrospect I should have used more dark green to make the letters but I didn’t have a lot of green left. Unlike some artists who have the best materials, and inventory everything beforehand, I look at what I have on hand and create from there.
Here’s a picture of the products I use in addition to tile and broken plates.
And here is a current picture of the wall from today, August 3rd.
Since I created elements of the wall and patched them together later, much the way a person gradually fills in their skin canvas with tattoos, I can go back after the fact and post by type. Had I known the wall art would get so extensive I would have shared it from the onset.
One of the first items I added was the sun. Shortly after, I began to add stars. This was around the time I discovered I could get penny tiles at Home Depot online. The sun was a mixture of broken 99 Cent Store plates and yellow penny tiles. The stars are penny tiles.
I also discovered black grout paint. On other scenes I tried to mix the paint with the grout but it came out a charcoal gray or lighter and I didn’t like the effect. What I’ve done since is paint the white in between the tiles with a toothpick or Q-tip. I can wipe or scrape away the paint from the tile later. This was a great discovery for me and opened up a whole new world of options for me.
I managed to snag about a dozen dark blue plates from the 99 Cent Store which made me think of a night sky. I set out to make a night sky with stars. Later I added a moon and more night sky to fill in blank areas.
Over on the right, I made a Martian in honor of my daughter’s father who is obsessed with UFOs, and also to commemorate the fact that the government quietly announced there are UFOs out there and have been the whole time. Maybe that’s paraphrasing, but announcing it in the midst of a pandemic, and protests and riots for the George Floyd killing, pushed it to the very bottom of the news, below the Kardashians.
As always, here’s a pic of the materials I use. I’m not getting a commission on this, and don’t provide a link. I just love these products. For small jobs like this too, it would be a hassle to be mixing grout all the time and guessing how much to use.
Here’s an overall picture from today. I’m still adding so stay tuned.